Should You Make Homemade Vanilla Extract
Imagine transforming your baking experience with just a few simple ingredients from your pantry. Homemade vanilla extract isn't just for the culinary enthusiasts; it's a secret weapon for anyone craving authenticity in their kitchen creations. The depth of flavor it provides can be the difference between a good dessert and an unforgettable one.
Vanilla extract, historically reserved for those with refined tastes, can now be easily replicated at home with a bit of patience. Statistically, making your own can be cost-effective in the long run, considering the rising price of commercial vanilla products. Armed with just vanilla beans and alcohol, you empower your recipes with unmatched richness and personalization.

Unveiling the Glory of Homemade Vanilla Extract
Homemade vanilla extract is a game-changer for anyone who loves baking. The rich, complex flavors it offers are miles ahead of store-bought versions. It's not just a cooking ingredient; it's an experience.
Using high-quality vanilla beans and alcohol, you can create an extract that's uniquely yours. The process itself is surprisingly simple and rewarding. Plus, it allows for endless possibilities in your culinary adventures.
Unlike commercial products, homemade vanilla extract has no added chemicals or artificial flavors. Everything about it is pure and natural. This means you're not only getting better flavor but also a healthier option for your recipes.
Making your own vanilla extract can also be a great gift idea. Friends and family will appreciate the effort and the quality. Personalized bottles filled with this flavorful liquid can be a memorable and delightful present.
Key Ingredients to Craft Your Own Vanilla Extract
Creating your own vanilla extract starts with gathering a few essential ingredients. The quality of these ingredients can greatly impact the final product. Let's dive into the key components needed for homemade vanilla extract.
High-Quality Vanilla Beans
The heart of your vanilla extract lies in the vanilla beans. Look for beans that are plump and glossy, with a rich aroma. Mature beans from regions like Madagascar or Tahiti are often recommended.
Vanilla beans are categorized mainly into two types: Bourbon and Tahitian. Bourbon vanilla beans have a deep, creamy flavor, while Tahitian beans offer a fruity and floral taste. Choose based on the flavor profile you prefer.
It's also essential to use whole beans rather than pre-cut ones. Splitting the beans open releases more flavor, enhancing your extract's richness.
Alcohol Base
The alcohol you use plays a critical role in extracting the flavors from the vanilla beans. Most recipes recommend using vodka because it's flavorless and won't interfere with the vanilla taste. Opt for a mid-range vodka for the best results.
You can also experiment with other types of alcohol like rum or bourbon. These can add additional flavor notes to your vanilla extract. Just ensure the alcohol content is at least 35%.
Avoid using flavored or low-quality alcohol, as these can negatively impact your extract's taste and clarity.
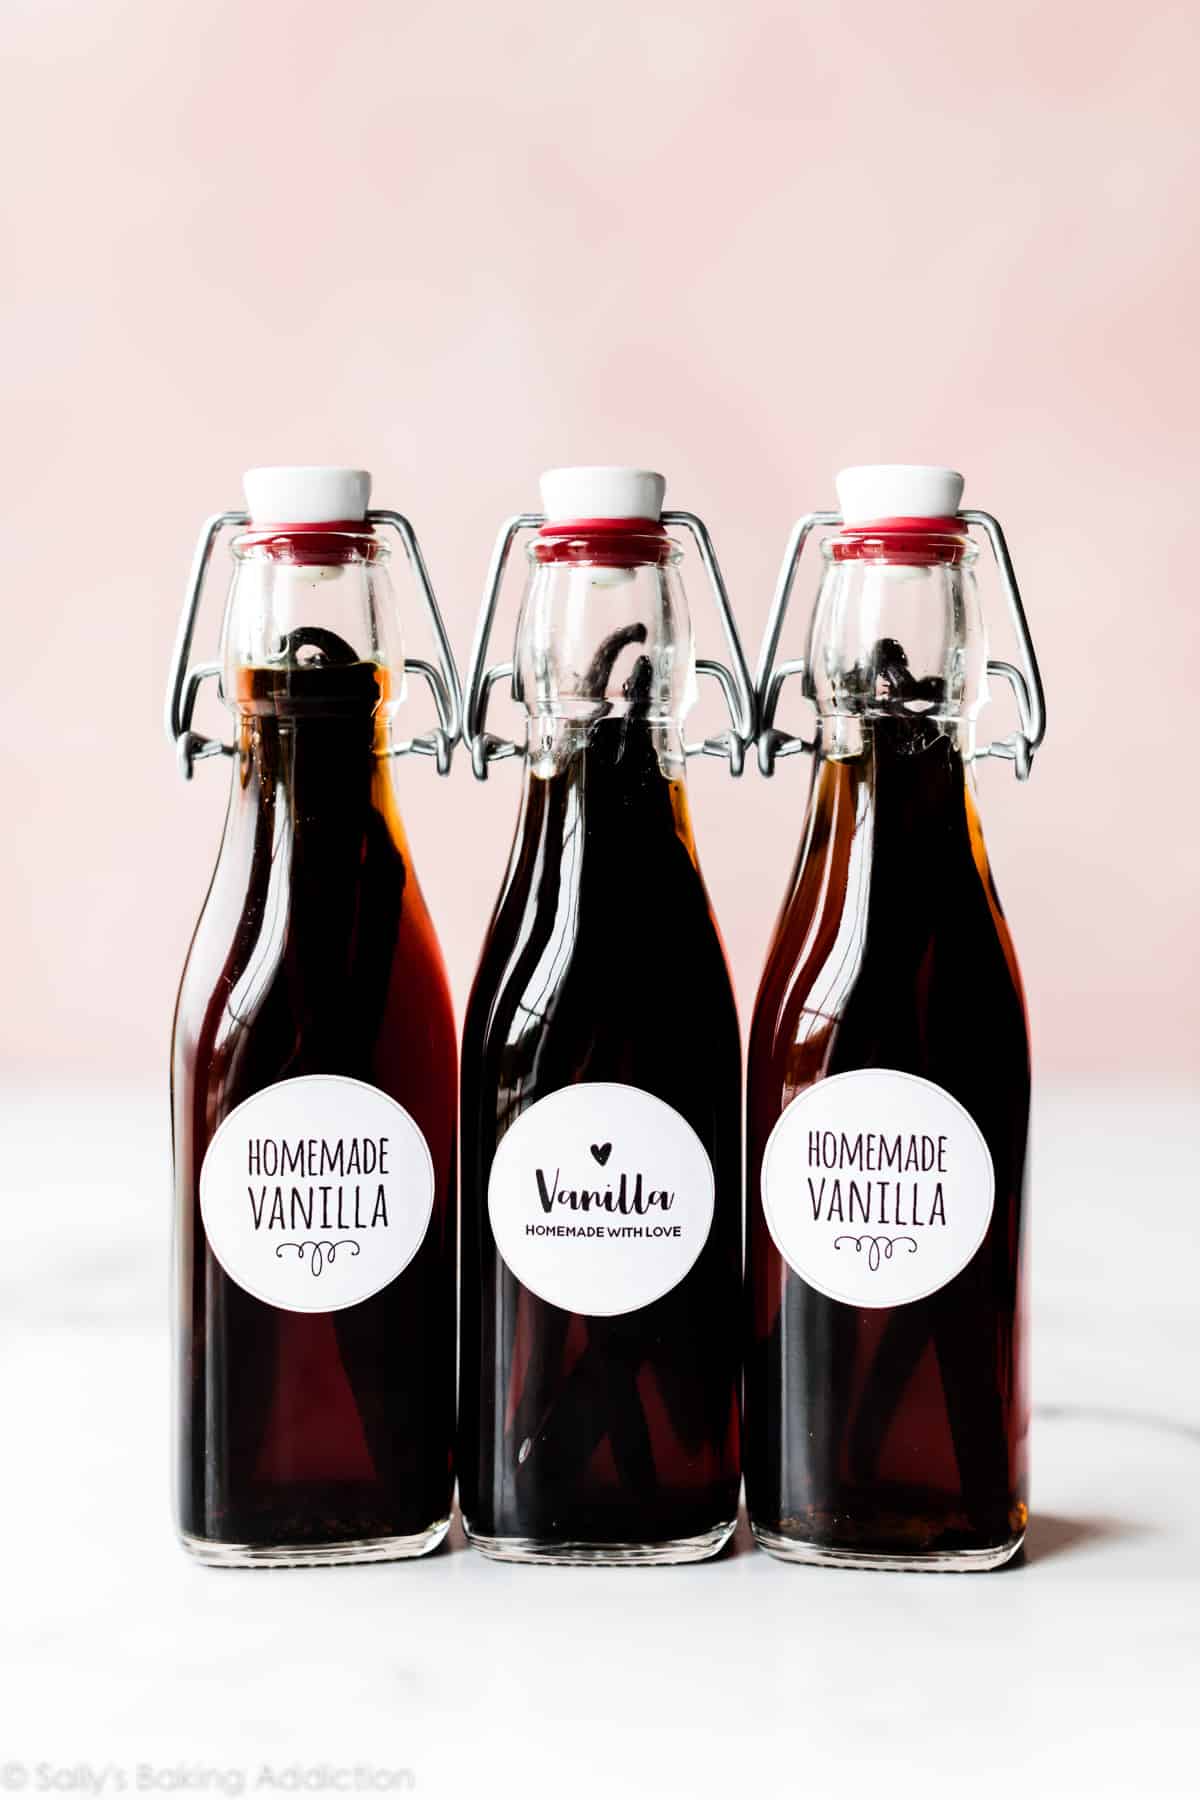
Storage Bottles
Once you've combined your beans and alcohol, you'll need appropriate storage bottles. Dark glass bottles are ideal because they protect the extract from light, which can degrade its quality. Consider using amber or cobalt blue bottles.
Ensure the bottles are clean and completely dry before use. Any moisture can dilute the alcohol, affecting the extraction process. Sealing the bottles tightly is also crucial to maintain freshness.
Label your bottles with the date of creation to keep track of the aging process. Homemade vanilla extract typically requires a few months to reach its full potential.
The Financial Benefits of Making Your Own Vanilla Extract
Making your own vanilla extract can save you a significant amount of money. Commercial vanilla extract has become quite expensive due to the rising cost of vanilla beans. By crafting it at home, you can cut down on these costs.
A single vanilla bean can flavor up to a cup of alcohol, creating several servings of extract. Over time, this becomes much cheaper than buying it pre-made. Plus, you can make large batches to last even longer.
The initial investment in high-quality beans and alcohol may seem high, but it pays off. These ingredients can be bought in bulk, reducing the overall cost per ounce of extract. Your homemade vanilla extract becomes more economical with each use.
Additionally, homemade vanilla extract can double as a thoughtful and budget-friendly gift. Small, beautifully labeled bottles can be given to friends and family during holidays or special occasions, adding a personal touch that store-bought items lack.
The Simplified Process of Making Vanilla Extract at Home
Making vanilla extract at home is surprisingly simple and straightforward. You only need two main ingredients: vanilla beans and alcohol. This process is accessible to anyone, regardless of culinary experience.
First, gather your vanilla beans and alcohol. For a basic recipe, use about six vanilla beans per cup of alcohol. Vodka is commonly used, but rum or bourbon can also add unique flavors.
Next, split the vanilla beans lengthwise to expose the seeds. Place them in a clean glass bottle or jar. Cover the beans completely with alcohol to start the extraction process.
Seal the bottle or jar tightly and give it a good shake. Store it in a cool, dark place for at least two months. Shake the bottle once a week to help the flavors meld.
As time passes, you'll notice the liquid darkening and developing a rich vanilla aroma. After two months or more, your homemade vanilla extract will be ready to use. It's as simple as that!
For a stronger flavor, you can let the extract sit for up to six months. The longer it sits, the more intense the flavor will become. Enjoy your homemade vanilla extract in various recipes, from cookies to cakes and more!
The Magic of Patience in Extracting the Best Flavors
The secret to the best homemade vanilla extract is patience. Allowing the extract to sit for several months enhances its flavor significantly. This waiting period is where the magic happens.
Initially, the alcohol works to draw out the flavors from the vanilla beans. Over weeks and months, this extraction process deepens. The longer you wait, the richer the flavor becomes.
Many prefer to wait a minimum of six months for maximum flavor. This gives enough time for the vanilla to fully infuse into the alcohol. If you're patient, the result will be well worth the wait.
To ensure you’re on the right track, shake the bottle every week. This helps to mix the contents and speed up the extraction process. You’ll witness a change in color, from clear to a deep amber.
It’s tempting to use your extract early, but resist the urge. The best flavors develop over time, making your patience worthwhile. Think of it as a culinary investment.
This extended aging process also allows for any traces of harsh alcohol to mellow out. The result is a smooth, aromatic vanilla extract. Trust in the process and enjoy the rewards of your patience.
Experimenting with Your Homemade Vanilla Extract
Once you have your homemade vanilla extract, there are endless ways to use it. Baking is the most obvious choice, but don't stop there. Consider adding it to beverages and savory dishes as well.
For drinks, a dash of vanilla extract can transform your morning coffee or afternoon tea. It's also excellent in smoothies and milkshakes. Drizzle a bit into hot chocolate for a comforting twist.
Homemade vanilla extract is a wonderful addition to sauces and marinades. It pairs well with both sweet and savory flavors. Try adding a splash to your next barbecue sauce or salad dressing.
In baking, the uses are endless. Add it to cookies, cakes, and pastries for a rich, aromatic touch. Even simple recipes like pancakes or waffles benefit from its addition.
You can also customize your vanilla extract. Use different types of vanilla beans or mix multiple kinds. Consider adding a star anise or cinnamon stick for a unique flavor profile.
Experiment with different alcohol bases as well. Rum, bourbon, or even brandy can all add distinctive flavors to your extract. The possibilities are only limited by your imagination.
Storage and Shelf Life of Your Homemade Vanilla Extract
Proper storage is essential to maintain the quality of your homemade vanilla extract. Use dark glass bottles to protect it from light, which can degrade its flavor. Amber or cobalt blue bottles are ideal choices.
Once you’ve filled your bottle, seal it tightly. Store it in a cool, dark place like your pantry or a kitchen cabinet. Avoid places with temperature fluctuations.
The shelf life of homemade vanilla extract is quite long. Most sources suggest it can last indefinitely if stored properly. This makes it an excellent investment for avid bakers.
However, over time, the extract may lose some potency. For best results, use it within five years. If you notice any changes in smell or color, it's time to make a new batch.
You can also top off your jar with additional alcohol as you use the extract. This helps maintain its potency and ensures you always have some on hand. Just remember to shake the bottle well after adding more alcohol.
By following these simple storage tips, you’ll maximize the lifespan and flavor of your vanilla extract. Keep track of when you made each batch by adding labels with dates. This way, you'll always know how old your extract is.
Elevating Your Culinary Experience with Homemade Vanilla Extract
Homemade vanilla extract can be your secret weapon in transforming ordinary dishes into extraordinary ones. The depth of flavor it adds is unmatched by store-bought extracts. It's a small change that can make a big difference.
Imagine adding homemade vanilla extract to your morning oatmeal or yogurt. The hint of vanilla brings a comforting aroma and taste. Even simple dishes become more delightful.
In baking, homemade vanilla extract shines bright. It enhances the flavors in cookies, cakes, and pastries. Your baked goods will have a richer and more complex flavor profile.
Expand your use beyond sweets by incorporating it into savory dishes. A splash of vanilla extract can enhance sauces, dressings, and even marinades. It pairs well with ingredients like seafood, chicken, and even vegetables.
This versatile ingredient can also elevate your beverages. Add it to coffee, tea, or even cocktails. The result is a refined and aromatic drink that impresses every time.
Experimenting with homemade vanilla extract opens up a world of culinary possibilities. It's a simple addition that can elevate your entire cooking experience. Start exploring its benefits in your kitchen today.
Frequently Asked Questions
Homemade vanilla extract is a popular choice for many culinary experts. Here are some common questions and answers to help you understand its benefits and processes better.
1. How long does homemade vanilla extract need to sit before use?
Homemade vanilla extract generally needs to sit for at least two months before it’s ready to use. This allows enough time for the flavors from the beans to fully infuse into the alcohol, creating a rich, aromatic extract.
For even deeper flavor, many people let it age for six months or longer. The longer it sits, the more robust and complex the flavor becomes, making your homemade extract well worth the wait.
2. What type of alcohol should I use for homemade vanilla extract?
The most commonly recommended alcohol for making vanilla extract is vodka. Vodka has a neutral flavor that doesn't overpower or alter the taste of the vanilla beans.
You can also experiment with other spirits like rum or bourbon to give your extract unique flavor profiles. Just make sure that the alcohol content is at least 35% to effectively extract the flavors from the beans.
3. Can I reuse vanilla beans after making an extract?
Yes, you can reuse vanilla beans after making an initial batch of extract. Simply dry them out and store them properly in an airtight container until you’re ready to use them again.
You may find that subsequent extracts will be lighter in flavor compared using fresh beans. To boost flavor, consider adding one or two new beans along with reused ones when starting a new batch.
4. How should I store homemade vanilla extract?
Your homemade vanilla extract should be stored in dark glass bottles if possible. Dark bottles help protect against light exposure, which could degrade the quality over time.
Keep your bottles in a cool, dark place like a pantry or cupboard away from heat sources and sunlight. Properly stored, your homemade vanilla will maintain its quality for years.
5. Is there a difference between types of vanilla beans?
Bourbon and Tahitian are two main types of vanilla beans commonly used in extracts. Bourbon beans are known for their traditional deep, creamy flavor while Tahitian beans offer fruity and floral notes.
The type you choose depends on your personal preference and how you plan to use the extracted flavors in recipes. Experimenting with different types can also yield exciting results that vary by dish!
Final Thoughts
Creating homemade vanilla extract is a rewarding and cost-effective venture. Its superior flavor and natural ingredients make it a must-have in any kitchen. From baking delights to enhancing savory dishes, its uses are endless.
With a bit of patience, you can craft an extract that elevates your culinary skills to the next level. The process is simple, but the results are phenomenal. Enjoy the rich and complex flavors that only homemade vanilla extract can offer.